Bleed Brakes by Yourself
Master the Art
Bleed Brakes by Yourself
Master the Art
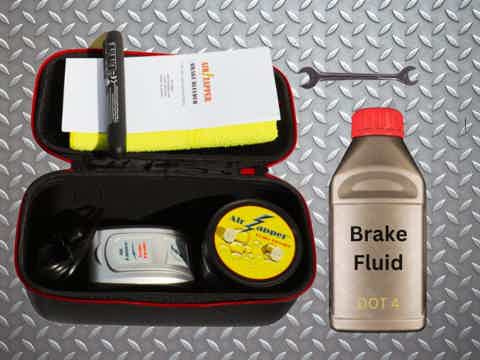
Tools Required to Bleed Brakes by Yourself
Bleeding brakes is an important maintenance task that ensures your bike's braking system is working at its best. While it can be done by a professional mechanic, you can easily do it yourself with the right tools. Here are the essential DIY tools you'll need to bleed brakes by yourself:
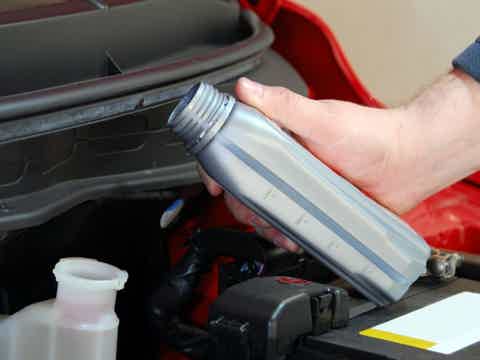
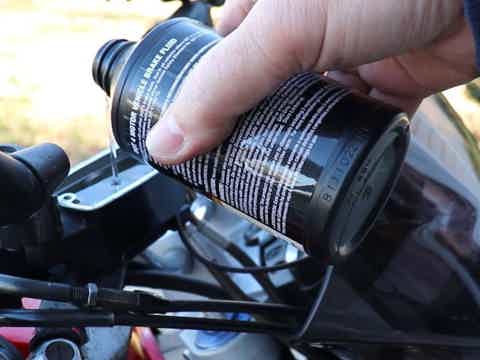
- Brake fluid: The first thing you'll need is brake fluid. Make sure you get the right type for your motorcycle, as specified in the owner's manual and most likely printed on the top of the fluid reservoir. It is advisable to get a fresh bottle of brake fluid or one that you know has been properly sealed to ensure optimal performance.
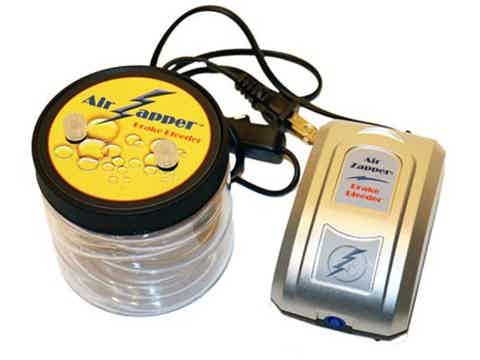
- Brake Bleeder Kit: This kit is a must-have for bleeding brakes by yourself. It usually includes hoses, a plastic fluid reservoir, and a vacuum source, normally a hand or electric vacuum pump. The hoses connect the reservoir to the brake bleeder screw (sometimes called bleeder valve). There is another tube to connect the plastic reservoir to the vacuum source. The kit's reservoir catches the old brake fluid as it exits your brake system.
- Wrench: You'll need an open end wrench to loosen and tighten the brake bleeder screw. The size of the wrench will depend on the make and model of your bike.
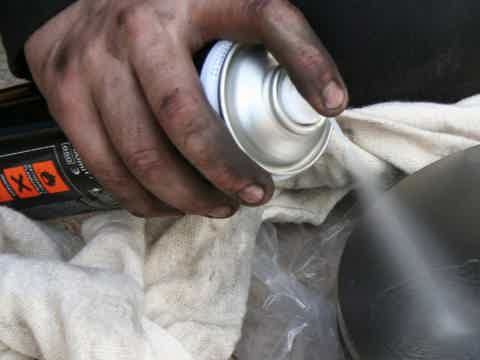
- Brake cleaner: Brake cleaner will help you clean up any spilled brake fluid or other debris that may have accumulated around the brake caliper.
- Clean rags or towels: You'll also need clean rags or towels to wipe off any dirt or grease that may have accumulated around the brake caliper. You can also place a piece of cardboard under the brake caliper to soak up any drips.
Brake fluid: The first thing you'll need is brake fluid. Make sure you get the right type for your vehicle, as specified in the owner's manual. It's also advisable to get a fresh bottle of brake fluid or one that you know has been properly sealed to ensure optimal performance.
Brake Bleeder Kit: This kit is a must-have for bleeding brakes by yourself. It usually includes hoses, a plastic fluid reservoir, and a vacuum source, normally a hand or electric vacuum pump. The hoses connect the reservoir to the brake bleeder screw (sometimes called bleeder valve). There is another tube to connect the plastic reservoir to the vacuum source. The kit's reservoir catches the old brake fluid as it exits your brake system.
Wrench: You'll need an open end wrench to loosen and tighten the brake bleeder screw. The size of the wrench will depend on the make and model of your vehicle.
Jack and jack stands: To access the brake calipers, you'll need to jack up the car and put it on jack stands. This is so you can remove the wheels for easy access the caliper bleeder screw.
Jack and jack stands: To access the brake calipers, you'll need to jack up the car and put it on jack stands. This is so you can remove the wheels for easy access the caliper bleeder screw.
Brake cleaner: Brake cleaner will help you clean up any spilled brake fluid or other debris that may have accumulated around the brake caliper.
Clean rags or towels: You'll also need clean rags or towels to wipe off any dirt or grease that may have accumulated around the brake caliper. You can also place a piece of cardboard under the brake caliper to soak up any drips.
Clean rags or towels: You'll also need clean rags or towels to wipe off any dirt or grease that may have accumulated around the brake caliper. You can also place a piece of cardboard under the brake caliper to soak up any drips.
Step-by-Step Guide to Bleed Brakes by Yourself
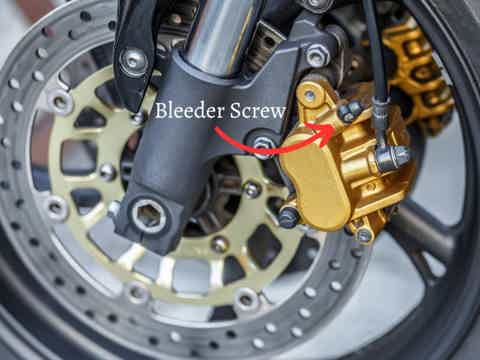
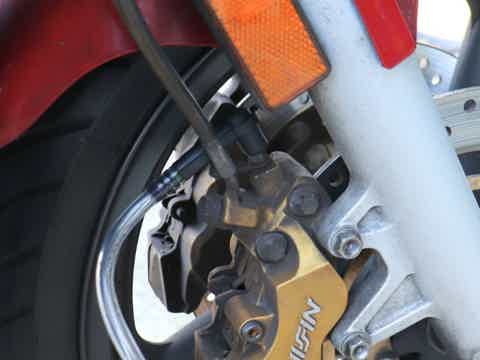
- Locate the brake bleeder screw usually located at the caliper.
- Attach the bleeder kit- Next, attach the bleeder screw adapter/ connector on the clear plastic tubing from the bleeder kit reservoir to the bleeder screw.
- Loosen the brake bleeder screw- Using the wrench, loosen the bleeder screw. Do not remove it completely. Note: if you are just doing a quick bleed after maintenance skip to step 6. If you are completely changing out your brake fluid continue with Step 4 below.
- Start the vacuum source- If you are using a manual vacuum pump, simply pump, or if you are using an electric vacuum pump turn it on.
- Remove all fluid- Continue running the vacuum source until all fluid if removed from the brake line as indicated by all air coming from the bleeder screw.
- Fill the vehicle brake fluid reservoir- Remove the lid and fill the brake fluid reservoir with fresh brake fluid to the max level line. Be sure to use the recommended type of brake fluid for your motorcycle.
- Start the vacuum source- If you are using a manual vacuum pump, simply pump, or if you are using an electric vacuum pump turn it on.
- Remove all air from the brake line- Continue bleeding until a solid column of fresh fluid is observed in the plastic tubing with no bubbles. Note: Keep an eye on the fluid level in the vehicle brake fluid reservoir and top up as necessary to avoid introducing more air into the system
- Close the bleeder screw- With the vacuum still applied, close the bleeder screw and disconnect the brake bleeder from the bleeder screw. Stop the vacuum source by stopping manually pumping or turning the pump off. Wipe up any spilled brake fluid.
- Repeat steps 1-3 and 6-9 for the remaining caliper (if applicable). Note that fresh fluid will be indicated by a color change from dark to light.
- Once you've bled all the lines, tighten the bleeder screws and check the brake lever or pedal for proper feel and response. Roll the bike and apply the brake and make sure the calipers positively clamp on the rotors.
- Locate the brake bleeder screw on the caliper furthest from the vehicle brake fluid reservoir. The first step is to locate the brake bleeder screw, usually located at the caliper or the wheel cylinder. If you're not sure, refer to your vehicle's manual.
2. Attach the bleeder kit- Next, attach the bleeder screw adapter/ connector on the clear plastic tubing from the bleeder kit reservoir to the bleeder screw.
3. Loosen the brake bleeder screw- Using the wrench, loosen the bleeder screw. Do not remove it completely. Note: if you are just doing a quick bleed after maintenance skip to step 6. If you are completely changing out your brake fluid continue with Step 4 below.
4. Start the vacuum source- If you are using a manual vacuum pump, simply pump, or if you are using an electric vacuum pump turn it on.
5. Remove all fluid- Continue running the vacuum source until all fluid if removed from the brake line as indicated by all air coming from the bleeder screw.
6. Fill the vehicle brake fluid reservoir- Remove the lid and fill the brake fluid reservoir with fresh brake fluid to the max level line. Be sure to use the recommended type of brake fluid for your car.
7. Start the vacuum source- If you are using a manual vacuum pump, simply pump, or if you are using an electric vacuum pump turn it on.
8. Remove all air from the brake line- Continue bleeding until a solid column of fresh fluid is observed in the plastic tubing with no bubbles. Note: Keep an eye on the fluid level in the vehicle brake fluid reservoir and top up as necessary to avoid introducing more air into the system
9. Close the bleeder screw- With the vacuum still applied, close the bleeder screw and disconnect the brake bleeder from the bleeder screw. Stop the vacuum source by stopping manually pumping or turning the pump off. Wipe up any spilled brake fluid.
10. Repeat steps 1-3 and 6-9 for the remaining calipers beginning with the on the next furthest from the vehicle brake fluid reservoir. Note that fresh fluid will be indicated by a color change from dark to light.
11. Once you've bled all the calipers, tighten the bleeder screws and check the brake pedal for proper feel and response.
Watch the vacuum bleeding demo and see. It's simple to bleed your brakes or completely change the fluid out the fluid! The hands-free operation allows you to refill the reservoir without stopping the bleed. Remove air from your brake system after you replace pads or do a complete fluid change. Click below to see how easy it is

Air Zapper brake bleeders work great on most vehicles including cars and motorcycles. Also good for bleeding hydraulic clutch lines as well as brake lines. Check your vehicle service manual to make sure that vacuum bleeding is an acceptable method. Finally, always follow the procedures specified for your vehicle. Removing air from the line is an important part of brake maintenance. Periodic replenishment with fresh fluid makes sure your system stays clean and moisture free. These easy steps will help ensure that you maintain the optimum stopping power under all driving conditions